Welcome
Enid Williams Web developer, quilter and textile artist. Since 1995 I have been working with cloth. In 2002 I entered the text
New Sales Site
A few of my products can now be purchased through Square! Check it out. https://haley-studio.square.site/ And if somethingR
Black Sheep Bazaar IV
I’m glad to announce I’ll be vending at this event! Sunday, May 22 10 AM – 6 PM High Noon Saloon: 701 E Was
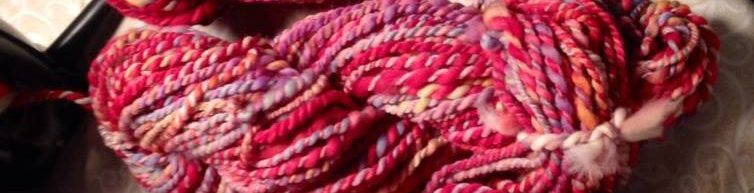
Madison Mini Maker Faire
I’ll be demonstrating the spinning of yarn! I’ll have yarn for sale as well as other fiber goodies to touch and pl
Stark Realty Craft Show
TENTH ANNUAL HOLIDAY SALE FEATURING LOCAL ARTISTS Saturday, December 6, 2014 – 10 a.m. to 4 p.m. The Stark Realty Building,
Aldo Leopold Nature Center Holiday Bazaar
I’ll be there with some new handspun wool yarn and LOTS of recycled crayons in easy-to-hold star shapes. Here’s th
Art opening tonight!
A Discourse on Love Absolutely Art 2322 Atwood Ave., Madison, Wisconsin 53704 Friday, June 6th, 2014 from 5p-9p A Discourse on
Arboretum Local Products Fair
Sunday, December 1 • 10 am – 4 pm Haley Studio and more than 40 other vendors will be selling recycled art and locally pro
Flower Bling
I joined Forward! Marching Band in January of 2013. I have really enjoyed playing my clarinet again — making music wit
Valentine Craftacular
I’ll be vending this year. Come check out my yarn and other goodies! The Valentine Craftacular will be held Saturday, Fe
Quiet book
I made a quiet book for my daughter and entered it in Spoonflower’s baby book contest. Click on any image to see it larg
Water spout from milk jug
I joined Pinterest recently. I was inspired by several posts describing creative uses for milk jugs. I tried out a few ide