On a trip to a store I hadn’t visited before, filled with all sorts of decorative goodies, I was tempted to buy the letter “K” to put in the baby’s room. Then I thought, “I can probably do this” and proceeded to figure it out. After a couple of days mulling it over, I decided to do this project.
After I started working on it, I decided to make this tutorial. So, not all of the steps have pictures, but I will try to make it all clear. I would say this is a medium-level project. It took me about ten hours (over two days) to make all 6 letters.
Items you will need:
- Cereal boxes, cards from shirts, or other lightweight cardboard
- Various fabrics (quilting cotton is a good weight)
- Lightweight batting or felt (I used polyester quilt batting)
- Glue and tape (I used Sobo, methyl cellulose, and Scotch tape)
- Scissors, box cutter, cutting mat and metal-edged ruler
- Curved sewing needle and thread
1. Audition your fonts.
You will want a sans serif font, most likely. You will probably not have a good result if you choose something really fancy. Compare the letters below.

The first is a good choice. It has a solid shape, distinct edges, and not a lot of curves. The second has skinny serifs as well as a thin line forming the top diagonal part of the letter. The third has far too many curves, as well as parts that are not connected.
Try out all the fonts you have available to you. I worked in Word and just tried everything out on the screen, including bold and condensed variants. I ended up using

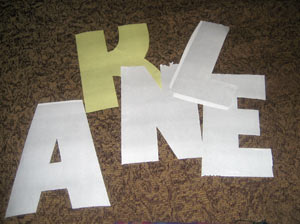
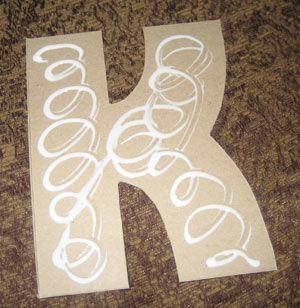
2. Print out each letter.
To save toner, I made my letters gray instead of black. You can also use a program like Illustrator to make white letters with a black outline if you like. I printed on scratch paper (the K came out on a beige piece of paper). If your word has two of the same letter (like the “A” in Kalena) you only need to print one. You don’t need to cut the letters away from the paper — in the picture below they’ve already been used to cut out the cardboard pieces.
3. Cut out each letter twice in cardboard.
You will need two of each letter. One forms the back (base), the other the front face. You can tape the paper letter to the cardboard, or just hold it firmly as you cut. I cut all the straight edges with the box cutter and ruler, on the cutting mat, and then carefully cut the curved edges with the box cutter. Save your paper letters for step 12.
4. Cut strips for the sides.
After all the letters are cut out, cut cardboard strips for the sides of each letter. Instead of measuring around each letter to find out how much I would need, I just cut all the cardboard I had into strips. I used the width of my ruler as a guide. It’s about 1.25 or 1.5 inches wide. I used the sides of cereal boxes and whatever pieces I had left over.
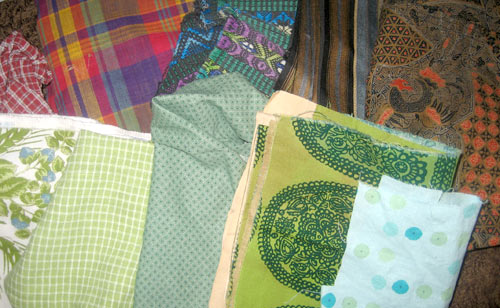
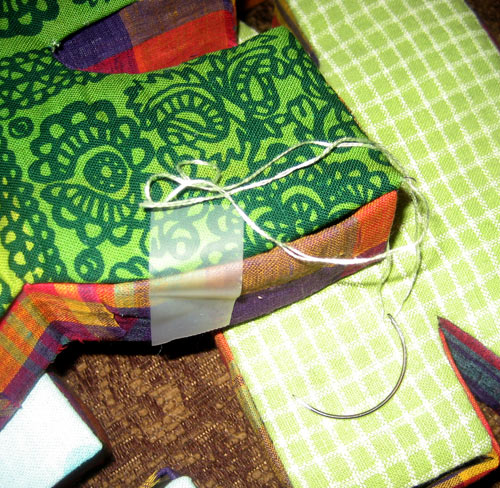
5. Audition your fabrics.
Decide what fabric you’d like to use! Here are the fabrics I was considering. I decided to use the greens, with the red plaid for the sides and back.
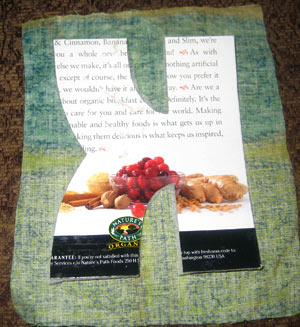
6. Form the back and sides.
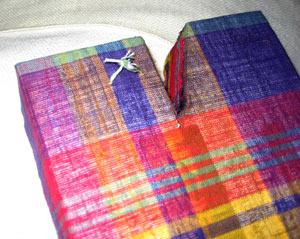
(I decided to make a tutorial after I’d completed the bases. Oops! So I don’t have good pictures of these steps. However, you can see the inside back in the picture below.)
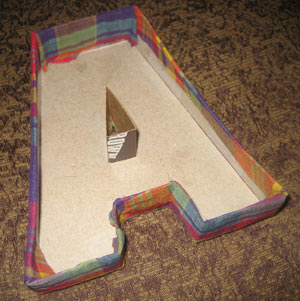
Make sure the letter’s right side is the INSIDE of the box you are making! Many letters are symmetrical… but many are not.
Line up side strips with the base. Tape the strip to the base (I tended to tape on the inside, but you can tape on the outside too, as it will be hidden by the fabric). Score the cardboard on the outside at the corner. Make your score line perpendicular to the plane of the base. You can also make seams at corners. Make sure to tape securely.
7. Cover the back and sides with fabric.
Once the base has been formed, cover it with fabric. Brush glue onto the base and center it on the fabric, making sure there is enough fabric on each side to wrap around. I used methyl cellulose glue (a water-based glue used primarily in bookbinding) because I had some on hand. Use any glue that dries clear and non-shiny. Modge Podge or similar decoupage glue should work. Then wrap the fabric around as though you are wrapping a present. For tricky areas, such as the bottom inside of the “A”, you might need to add another piece of fabric.
You also have the option of wrapping the base with very little fabric coming up onto the sides, and then using a long strip of fabric all the way around the sides. I think this is how the letters that originally inspired me were made.
Another alternative would be to first cover the sides with a long strip of fabric, wrapping to the inside of the box, and overlapping the bottom face just a little, and then glue a neatly cut piece onto the bottom face.
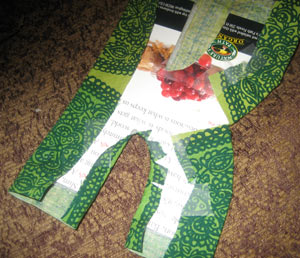
In the picture below you can see how the inside triangle of the “A” still needs a bit of extra fabric.
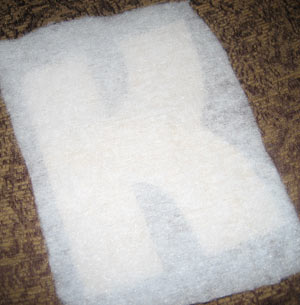
8. Pad the face.
First roughly cut some batting to the size of each letter. Here the letter is under the batting to make sure there is enough batting.
Spread some glue on the face of the letter.
Press the batting down firmly. Get to this step with all the letters.
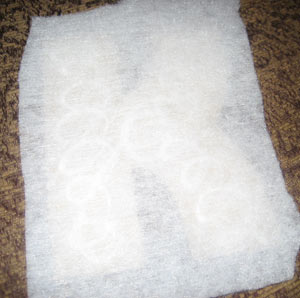
Cut away the excess batting, now that the letters have had a chance to dry.

This letter is ready for some fabric.
9. Add fabric to the face.
Position your letter on your fabric the way you want. If your fabric has stripes or a special motif, make sure it lines up the way you would like. I added some glue to the top of some letters before this step, but sometimes the glue showed through more than I would like! You probably don’t need glue on top of the batting.
Start wrapping the letter with the fabric, making cuts at the concave area and when going around curves. In the picture below you can see several snips in the fabric around the bottom inside part of the letter, and some overlapping fabric on the convex bottom outside. It helps to do the long straight parts of the letter first. Make sure it is wrapped tightly. Secure with tape or glue. I found tape to be strong and convenient to use.
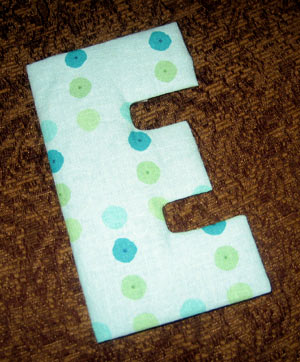
In the letter E below, you can see how the fabric has been snipped at the inside corners.
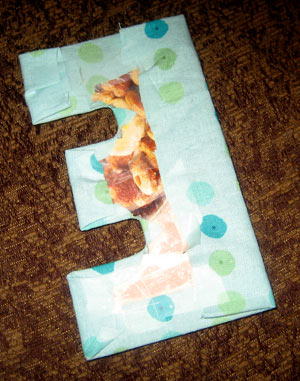
The completed E face.
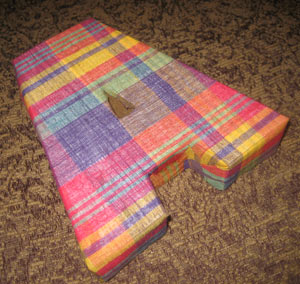
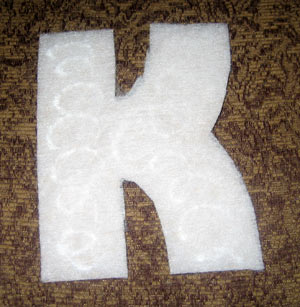
The completed K face.

All the letters’ faces are now ready to sew to their bases.
10. Sew the face to the base.
I used two strands of embroidery floss to sew the faces to the bases. A curved needle helps a lot, but a small straight needle can work too. The trickiest part was the inside of the letters (like the top of the K, in between its “arms”). The outside parts were much easier. First, tape the face to the base with a tape that won’t leave a mark. I used the same Scotch tape I’d used for taping the insides. Match the corners — if all your sides are perpendicular to the base, you should be able to match the top and base perfectly. However, you should have a little wiggle room too. Match them up as well as you can.
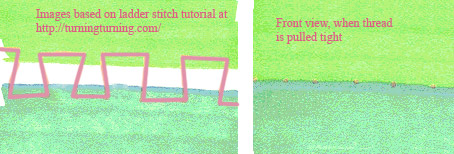
Then use blind stitch to sew the fabric of the face to the fabric of the base. Don’t try to sew through the cardboard. This link is the nicest tutorial I found BUT I make sure to back-stitch just slightly for my next stitch — look carefully at the diagram below — while she has you go directly across from your outgoing hole for your ingoing stitch. Her way will leave a little bit of thread showing, while my way is even more invisible. (If you find another good blind stitch tutorial I’ll link to it!)
11. Add a hanging loop.
Let’s face it, I went for the quick and dirty solution here! I used the same embroidery floss I used to sew the faces to the bases. I just sewed through the back fabric with the curved needle. You could also sew through the cardboard here if you like — punching a hole with an awl before putting the face on would be nice also.
12. Hang them up!
Tape the paper letter templates to the wall to figure out where the finished letters will look best. (Or do what I did and just eyeball it!) Note that some letters (A, E, B, I, J, W, D) can have their hanging loops pretty centered, but other letters (K, L, N, V, X, H, M) will have a hanging loop to one side. So don’t try to make them all line up exactly… it just won’t happen! However, you could add invisible or decorative string to the top of your letters and use a decorative hook. I chose to hang the string loops on some thin nails.
I hope you enjoyed this tutorial and that you will enjoy this project as well! Feel free to let me know what I left out and I’ll update the page.